Adding Google Analytics
To WordPress – Tutorial
I received a question on the best way to add Google Analytics code to a wordpress blog. Although I typically do not like to use too many plugins in WordPress, there are some that are too good to pass up.
 Here’s What I Used To Do To Avoid Using A Plugin for Analytics
In the past, I used to add my analytics code directly into my template header or footer code. That has worked well for me for quite a while except for 1 “small”, but very important issue that I kept forgetting about. Whenever I did a template update or changed my template completely, I would forget that I needed to install the Google Analytics code into the new template or update. Sometimes I would lose a few days or weeks of analytics data. This was a huge issue when revenue or traffic started decreasing and when I went in to see if I could figure out why, the data was not there. It left me blind to what was going on and to know if a Google search algorithm like “panda” or “penguin” was the culprit. It happened a couple of times, but not enough to sway me into looking for a plugin just for analytics.
The Problem With WordPress Plugins
A few months ago, one of my WordPress blogs had a vulnerability that allowed a hacker access to ALL my WordPress blogs on my hosting account (there was over a dozen sites I had that got hacked there) possibly because of a plugin vulnerability. Although I am not totally sure it was a plugin that caused the hack, I have had enough issues with other plugins, that I don’t like to use them unless they’ve been proven to be too valuable, like “All In One SEO”. Plugins can break your blog, so BE SURE TO BACKUP YOUR BLOG BEFORE DOING THE NEXT STEPS! Also, install the plugin at your own risk. Some have been known to not be compatible when WordPress updates happen.
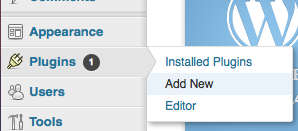
- First, be sure to login to your Dashboard, then go to the “Plugins” tab on the left menu and select “Add New”
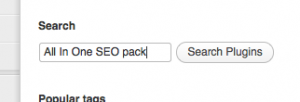
 In the Search Box, type in “All In One SEO Pack” and select “Search Plugin”
- Select the plugin called “All In One SEO Pack” (by Michael Torbert) by selecting the “Install Now” text link below the plugin title.
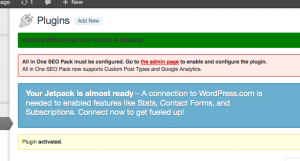
 Next, click on “Activate Plugin” and it will appear with your other plugins.
 You should see a pink box appear in your plugins section at the top of the page. Click on the red text “the admin page” to configure your plugin
 Look for the “Google Analytics ID:” field and fill in your google analytics number from your analytics account.
- Select “Update Options” at the bottom and you are done! Your analytics is now working.
